Pinto Fuel injection upgrade Updated 10th April 2010!
-
Timbo

- Posts: 80
- Joined: Mon Jul 06, 2009 11:22 pm
- Name: Tim King
- Location: Solihull
Re: Pinto Fuel injection upgrade Updated!
Would but I had the time Pete.....................
Don't put tomato ketchup on your salad cream sandwiches. It spoils the taste of the chocolate spread.
-
Timbo
- Posts: 80
- Joined: Mon Jul 06, 2009 11:22 pm
- Name: Tim King
- Location: Solihull
Re: Pinto Fuel injection upgrade Updated 17th Nov '09!
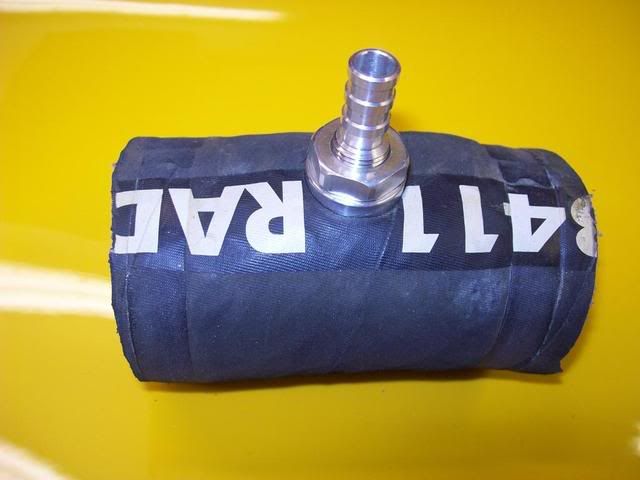
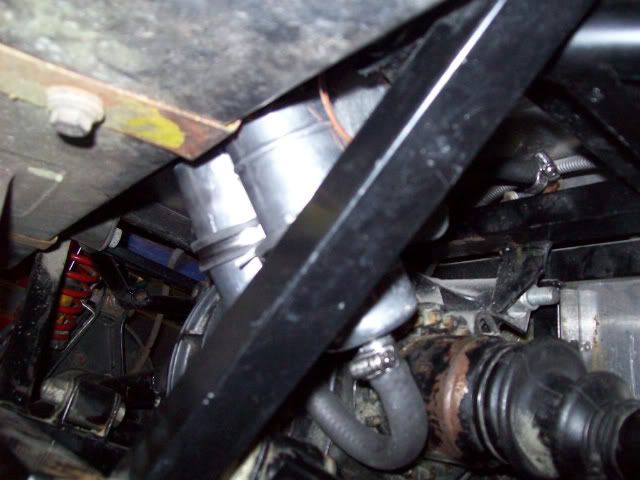
I've begun to install the fuel return line, and was a little unsure as to how I was going to plumb this into the tank. It was a bit of an oversight when I built the car not to put an access panel in the boot floor to the top of the tank, and as anyone with a fury will know, it's impossible to get at it once the tub is on! Since the tank is plastic however, I shouldn't need to get at it other than if it splits, and this would be pretty major if this were to happen. I decided therefore to tap into the filler neck, (which I can get at!) with a self sealing hose connector.
The other consideration was the route for the fuel return line. I have no real room left in the tunnel ,as my car is an IRS so has a low tunnel top, and is filled with handbrake lever, and storage box, so I decided to run it down the nearside sill pod.(Pinto engined, so the exhaust keeps the driver warm!)I also have rear wheel arch liners, so this should protect the line from stone chips . As it works out it is possibly the easiest route,as the tank filler neck is that side too, so all was needed was a bit of hose to join the two together.
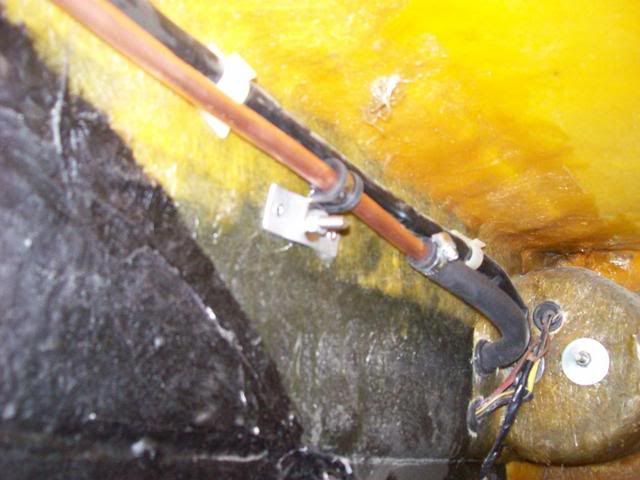
At this point, I found out that the existing hose clips were pretty much shot, so I'm awaiting a new set of hose clips and a few other bits and pieces to finish the fuel delivery / return.
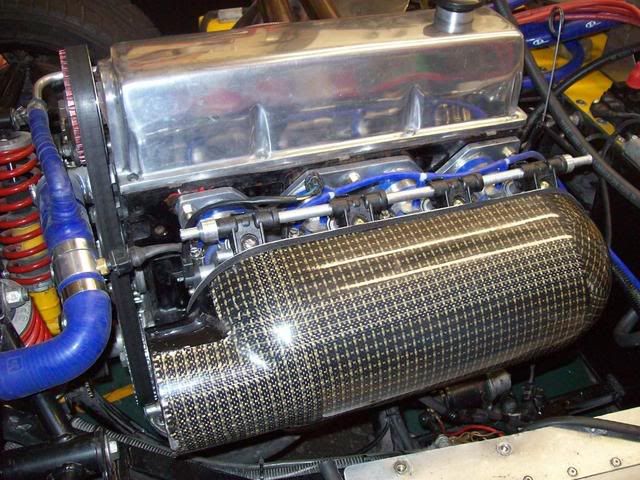
Whilst I was waiting for these bits, i decided to get on with the airbox. I had bought a carbon fibre box of a mate with a Westfield about 5 years ago, with the intention of fitting it to my 45's, but there wasn't the room, it fouled on the bonnet badly, and since i didn't want to cut a hole in the bonnet it got consigned to the top shelf in the garage. I meant to sell it, but always forgot about it. The new mounting position however seems to be ideal, and it all seems to fit.
First job was to make a backplate
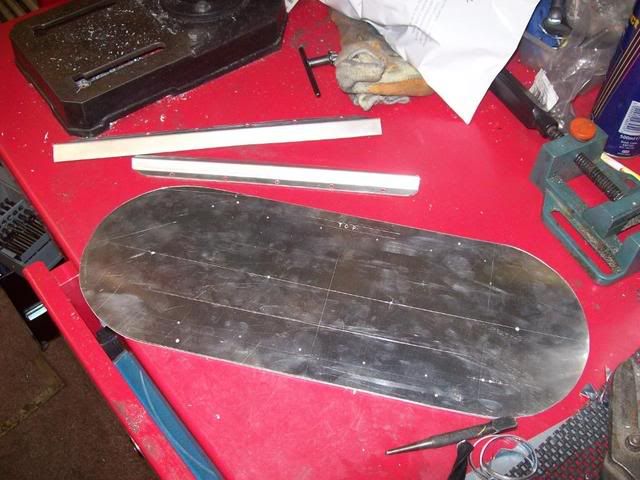
I also fitted some stiffeners to it, as the sheet is only 20swg, so can be quite flexible. These did the trick, and it sat on the ITB's nicely.
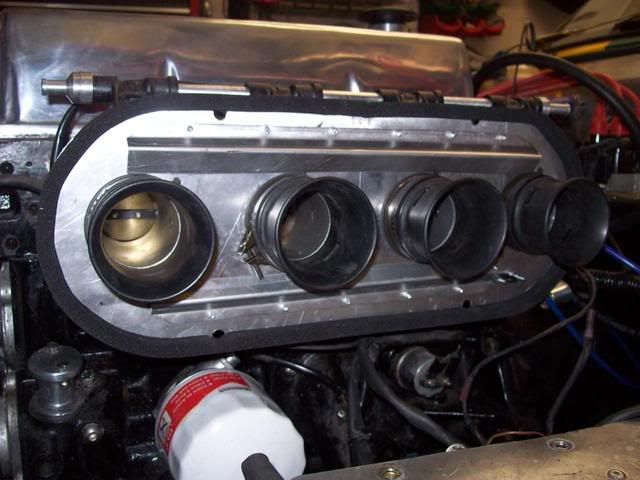
I then bolted the airbox top to this, and to my great surprise and relief, it all fits!
Jobs left to do now are,
FUEL DELIVERY
Replace fuel pump, install fuel filter, complete hoses to fuel rail and install pressure regulator.
AIR DELIVERY
Air filter, induction hose, cold air feed from Rad cowl.
WIRING
I only need to change the injector plugs to the bike type, as when i installed the megasquirt last year, I fitted mini timer plugs to the injector supply wiring, and connect up the TPS.
MANAGEMENT
Install a wideband lambda sensor into the exhaust. Again, the wiring is all in place, so once I've welded a boss into the exhaust manifold, it should just be a bolt in job and then onto the mapping.
The hardest part of this will probably be getting it started, and after this I will need to balance the ITB's, and then the fun really begins!
The other consideration was the route for the fuel return line. I have no real room left in the tunnel ,as my car is an IRS so has a low tunnel top, and is filled with handbrake lever, and storage box, so I decided to run it down the nearside sill pod.(Pinto engined, so the exhaust keeps the driver warm!)I also have rear wheel arch liners, so this should protect the line from stone chips . As it works out it is possibly the easiest route,as the tank filler neck is that side too, so all was needed was a bit of hose to join the two together.
At this point, I found out that the existing hose clips were pretty much shot, so I'm awaiting a new set of hose clips and a few other bits and pieces to finish the fuel delivery / return.
Whilst I was waiting for these bits, i decided to get on with the airbox. I had bought a carbon fibre box of a mate with a Westfield about 5 years ago, with the intention of fitting it to my 45's, but there wasn't the room, it fouled on the bonnet badly, and since i didn't want to cut a hole in the bonnet it got consigned to the top shelf in the garage. I meant to sell it, but always forgot about it. The new mounting position however seems to be ideal, and it all seems to fit.
First job was to make a backplate
I also fitted some stiffeners to it, as the sheet is only 20swg, so can be quite flexible. These did the trick, and it sat on the ITB's nicely.
I then bolted the airbox top to this, and to my great surprise and relief, it all fits!
Jobs left to do now are,
FUEL DELIVERY
Replace fuel pump, install fuel filter, complete hoses to fuel rail and install pressure regulator.
AIR DELIVERY
Air filter, induction hose, cold air feed from Rad cowl.
WIRING
I only need to change the injector plugs to the bike type, as when i installed the megasquirt last year, I fitted mini timer plugs to the injector supply wiring, and connect up the TPS.
MANAGEMENT
Install a wideband lambda sensor into the exhaust. Again, the wiring is all in place, so once I've welded a boss into the exhaust manifold, it should just be a bolt in job and then onto the mapping.
The hardest part of this will probably be getting it started, and after this I will need to balance the ITB's, and then the fun really begins!
Last edited by Timbo on Tue Nov 17, 2009 4:33 pm, edited 1 time in total.
Don't put tomato ketchup on your salad cream sandwiches. It spoils the taste of the chocolate spread.
-
NeilEverett

- Posts: 255
- Joined: Wed Jul 01, 2009 12:47 pm
- Name: Neil Everett
- Location: Warwick
- Contact:
Re: Pinto Fuel injection upgrade Updated 17th Nov '09!
Your already bling engine bay now looks blingerererererer...

Very nice!
Very nice!
-
Edd
- Posts: 495
- Joined: Tue Jun 02, 2009 4:25 pm
Re: Pinto Fuel injection upgrade Updated 17th Nov '09!
Hi Tim,
I really wish I had the time to do similar. EFI would be the only upgrade I can be bothered with in Striker, will see. Didn't even get it out of the garage last year!
Edd.
I really wish I had the time to do similar. EFI would be the only upgrade I can be bothered with in Striker, will see. Didn't even get it out of the garage last year!
Edd.
-
Timbo
- Posts: 80
- Joined: Mon Jul 06, 2009 11:22 pm
- Name: Tim King
- Location: Solihull
Re: Pinto Fuel injection upgrade Updated 17th Nov '09!
Edd wrote:Hi Tim,
I really wish I had the time to do similar.
Nice to know you're keeping busy then Edd!
Don't put tomato ketchup on your salad cream sandwiches. It spoils the taste of the chocolate spread.
-
Timbo
- Posts: 80
- Joined: Mon Jul 06, 2009 11:22 pm
- Name: Tim King
- Location: Solihull
Re: Pinto Fuel injection upgrade Updated 17th Nov '09!
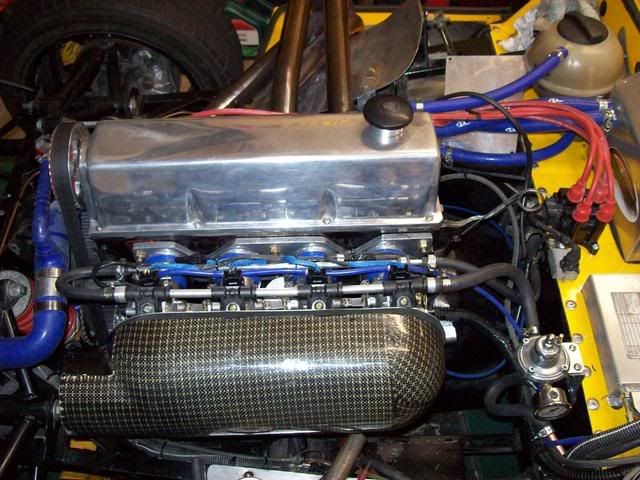
The installation is now almost complete, I've installed a fuel pump from a cavalier, pressure regulator,(both ebay items), a fuel filter from a focus, replaced my hoses and clips and tested it. I only had one leak from the fuel rail, and when I investigated the cause it was down to an "O" ring which had got pinched when I assembled it. A new ring sorted it, and as the regulator is adjustable, I tested the whole lot to 5 bar. With not a drop of petrol leaking anywhere, (phew!) I reset it to 3.5 bar. I'll give this a go, as I can always wind a bit more on. The regulator is vacuum compensated, although I don't have this connected yet, I think I'll try this after I have the car running on a stable basis.
I've completed the wiring for the injectors and the TPS. Looking at the loom that came with the throttle bodies, I have decided on the following for the TPS
Black = Neg
Yellow = signal
Blue = 5v reference
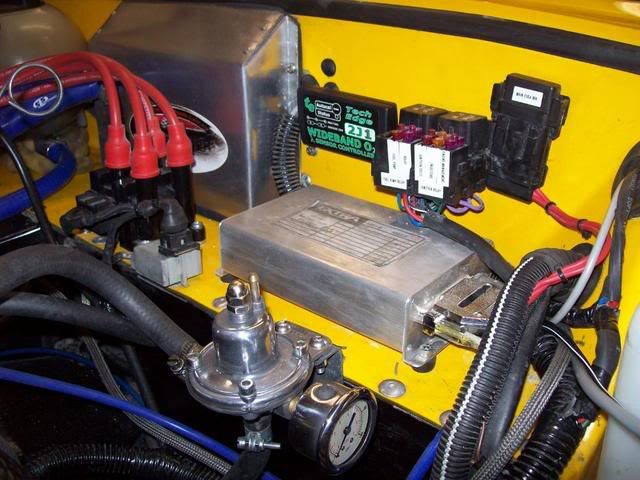
I've also started to install the lambda sensor kit I bought from Trigger wheels. This will mean a little more wiring than I anticipated, but only an additional 12v ignition switched. This will be easy enough, the relays and fuses which can be seen above the megasquirt are all ignition switched,and are for the sole use of the ECU and it's systems, so I can pick a supply from here quite easily.
The next job will be to finish the induction, I've got a pipercross air filter which fits inside the neck of the airbox quite nicely. I just need to figure out how I'm going to do it.
I've completed the wiring for the injectors and the TPS. Looking at the loom that came with the throttle bodies, I have decided on the following for the TPS
Black = Neg
Yellow = signal
Blue = 5v reference
I've also started to install the lambda sensor kit I bought from Trigger wheels. This will mean a little more wiring than I anticipated, but only an additional 12v ignition switched. This will be easy enough, the relays and fuses which can be seen above the megasquirt are all ignition switched,and are for the sole use of the ECU and it's systems, so I can pick a supply from here quite easily.
The next job will be to finish the induction, I've got a pipercross air filter which fits inside the neck of the airbox quite nicely. I just need to figure out how I'm going to do it.
Don't put tomato ketchup on your salad cream sandwiches. It spoils the taste of the chocolate spread.
-
NeilEverett
- Posts: 255
- Joined: Wed Jul 01, 2009 12:47 pm
- Name: Neil Everett
- Location: Warwick
- Contact:
Re: Pinto Fuel injection upgrade Updated 26th Nov '09!
Good progress again, Tim!
If you want a hand when it comes to starting and some initial mapping, give me a shout. Might see you at the meet next week anyway?
If you want a hand when it comes to starting and some initial mapping, give me a shout. Might see you at the meet next week anyway?
-
The Knobs
- Posts: 141
- Joined: Wed Jul 01, 2009 6:11 pm
- Name: Tim Price
Re: Pinto Fuel injection upgrade Updated 26th Nov '09!
Is that regulator going to do for 3 bar as it looks like a carb type ?
-
Timbo
- Posts: 80
- Joined: Mon Jul 06, 2009 11:22 pm
- Name: Tim King
- Location: Solihull
Re: Pinto Fuel injection upgrade Updated 26th Nov '09!
Well unless someone has gone to the trouble of printing a new scale on the pressure guage and then refilling it with glycerine then it should do!  The scale on the guage indicates pressure from 0 - 6 bar. (0-90 psig) I wound it up to 5 bar for pressure testing, this was the pressure indicated on the guage, which screws into the same passage as the delivery (fuel rail) side of the Regulator. The original ebay listing described it as coming off an injected escort, and i've seen very similar ones listed for big japs. Since the control pressure is all about where the internal spring is set, then I see no reason why it shouldn't. By restricting the flow through the regulator, it effectively "holds back" fuel in the fuel rail. the excess is returned to the tank at atmospheric pressure. as long as the fuel pump can deliver,(this is rated @ 110 psig, (8 bar)) and the spring in the regulator is of the correct range, (which it clearly is) then there will be no problems.
Thanks for your concerns though.
Thanks for your concerns though.
Don't put tomato ketchup on your salad cream sandwiches. It spoils the taste of the chocolate spread.
-
Timbo
- Posts: 80
- Joined: Mon Jul 06, 2009 11:22 pm
- Name: Tim King
- Location: Solihull
Re: Pinto Fuel injection upgrade Updated 16th DEC '09!
Just a quick update on progress. I sat in my (heated) garage for 3 hours on Saturday, setting the megasquirt up,trying to get the car started. All I got for my efforts were a couple of pops and bangs in the exhaust and a bit of smoke from No3 throttle body before the battery went flat. All seems to be OK settings wise, all tests proved healthy until I checked the injectors. One click from each and no more. Conclusion, they are all sticking again.  So back to soaking in a jar of injector cleaner. The only other item left to complete is the cold air feed, but until the car is started and the ITB's are balanced, there's not much point in putting the airbox back on. Battery now on charge for a re-attempt this weekend.
Last edited by Timbo on Wed Dec 16, 2009 10:59 pm, edited 1 time in total.
Don't put tomato ketchup on your salad cream sandwiches. It spoils the taste of the chocolate spread.
Return to “Jeremy Philips Cars”
Who is online
Users browsing this forum: No registered users and 16 guests